Running an online store means you need a simple way for customers to pay you. Pesapal is one of the most trusted payment systems in East Africa, letting your customers pay with M-Pesa, bank cards, or bank transfers.
This guide will show you exactly how to add Pesapal to your DukaNext store in simple steps.
What You’ll Need Before Starting
- Your business registration documents
- A business bank account
- About 30 minutes of your time
- Access to your DukaNext store admin area
Step 1: Sign Up for Pesapal
Go to www.pesapal.com and click the “Sign Up” button.
Important: Choose “Business Account” when asked. Personal accounts won’t work with your online store.
Fill in your details:
- Your business name (exactly as registered)
- Business email address
- Your phone number
- Business address
Click “Create Account” and check your email to verify your account.
Step 2: Verify Your Business
Pesapal needs to verify your business before you can accept real payments. This keeps everyone safe.
Documents You’ll Need:
- Business registration certificate
- KRA PIN certificate (or tax number for other countries)
- Business license (if you have one)
- Bank account details
How to Submit Documents:
- Log into your Pesapal account
- Look for “Verification” in your dashboard
- Upload clear photos of your documents
- Click “Submit for Review”
Wait Time: Usually takes 1-3 business days. Pesapal will email you when it’s done.
Step 3: Get Your Payment Keys
Once Pesapal approves your business, they’ll give you two special codes that connect your store to their payment system.
Finding Your Keys:
- Log into your Pesapal dashboard
- Look for “API Settings” or “Integration”
- You’ll see two codes:
- Consumer Key (looks like: pk_test_12345…)
- Consumer Secret (looks like: sk_test_67890…)
Write these down or copy them somewhere safe! You’ll need them in the next step.
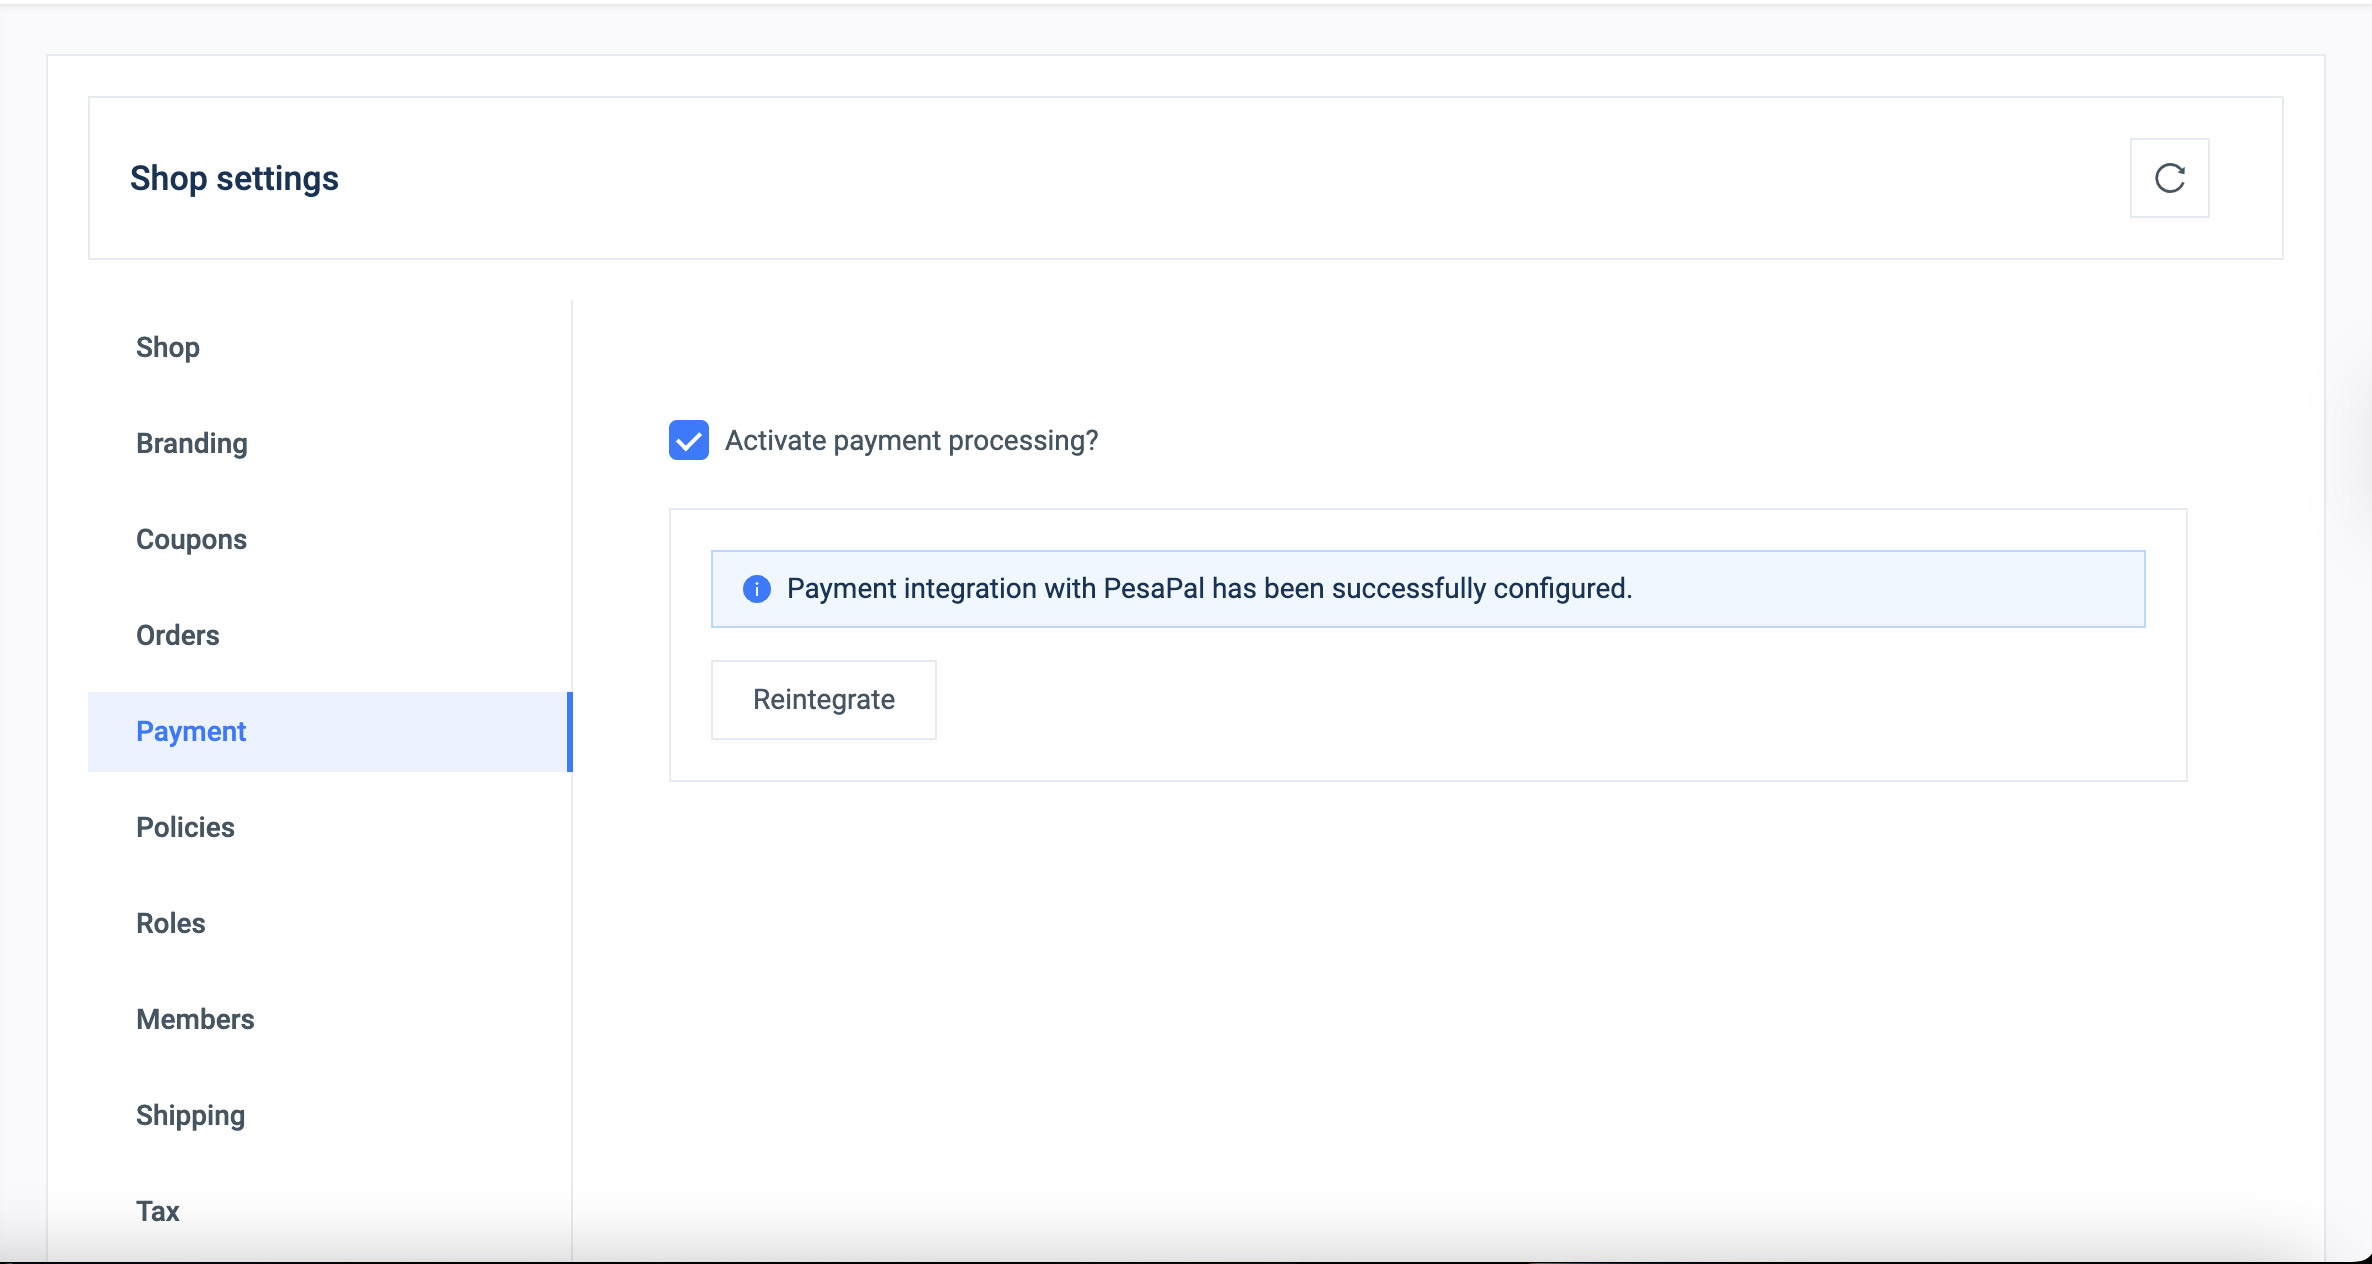
Step 4: Add Pesapal to Your DukaNext Store
Now let’s connect your store to Pesapal:
- Go to your DukaNext admin area
- Log into your store’s admin dashboard
- Find Payment Settings
- Look for “Settings” in your menu
- Click on “Payments” or “Payment Methods”
- Select Pesapal
- You’ll see a list of payment options
- Find “Pesapal” and click on it
- Enter Your Keys
- Paste your Consumer Key in the first box
- Paste your Consumer Secret in the second box
- Make sure “Enable Pesapal” is turned ON
- Click “Save”
That’s it! Your store can now accept payments through Pesapal.
Step 5: Test Everything Works
Before telling customers about your new payment option, test it:
- Place a Test Order
- Go to your store website
- Add something to cart and go to checkout
- Choose Pesapal as payment method
- Try a Small Payment
- Use your own M-Pesa or card
- Pay a small amount (like 10 KES)
- Check if the money reaches your Pesapal account
- Check Your Store
- Make sure the order shows as “Paid” in your admin
- Confirm you get email notifications
What Your Customers Will See
When customers choose to pay:
- They’ll see Pesapal’s secure payment page
- They can choose M-Pesa, Airtel Money, or bank card
- They’ll get a confirmation message after paying
- You’ll get notified about the payment